Boss Guide — Strategies for Every Boss Encounter
Boss encounters in Vampire Survivors: Legacy of the Bloodmoon present the most challenging moments of any run. This guide breaks down each major boss's attack patterns, phase transitions, and the builds best suited to take them down, so you can survive even the deadliest Bloodmoon waves.
Understanding Boss Waves and Spawn Mechanics
Bosses in Legacy of the Bloodmoon appear at fixed time thresholds during a run, often accompanied by a sudden surge of elite minions. When a boss spawns, the screen border briefly flashes crimson and all ambient enemies gain a movement speed boost, making positioning critical. Unlike standard elite enemies, bosses have multiple health bars, resist knockback, and cannot be frozen or stunned for their full duration by any single ability.
Each stage features its own boss rotation. Early-stage bosses tend to test your single-target damage output, while later bosses layer area-denial mechanics on top of massive health pools. Pay attention to the Bloodmoon Meter in the top corner — when it fills, boss encounters become significantly harder, adding extra phases and summoning additional minion waves that can overwhelm an unprepared build.
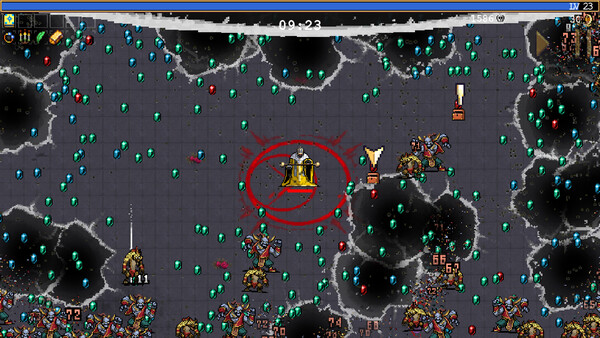
Early Bosses — The Hollow Knight and the Bone Colossus
The Hollow Knight is typically the first boss new players encounter. It charges in a straight line toward your position, leaving a trail of spectral flames that deal lingering damage. The key to this fight is constant lateral movement — never backtrack through the flame trails. Weapons with moderate area coverage, such as the Crimson Whip or evolved Garlic, work well here since the Hollow Knight periodically summons skeletal escorts that cluster around it.
The Bone Colossus appears in the mid-stage of most maps and is noticeably more durable. It slams the ground at regular intervals, sending out radial bone shards that cover a wide area. During these slam attacks, a brief safe zone exists directly beside the Colossus before the shards expand outward. Builds that stack area-of-effect damage and movement speed tend to fare best, as you need to dodge the shards while keeping sustained damage on the boss between its attack cycles.
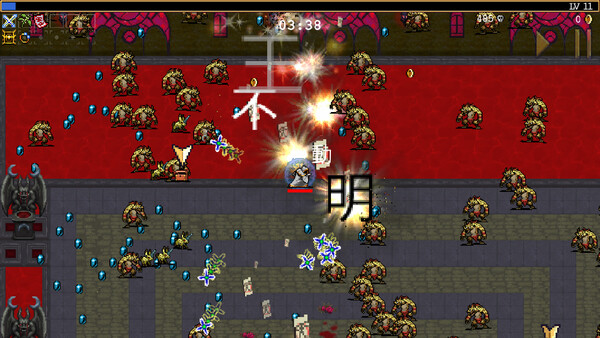
Mid-Game Elites — Crimson Matriarch and the Lycan Alpha
The Crimson Matriarch is the first boss that punishes purely defensive builds. She periodically spawns blood orbs that home in on your position and explode on contact, and she becomes temporarily invulnerable while channeling a wide-area blood rain that blankets a large portion of the screen. The optimal strategy is to burst her health between invulnerability phases using high-damage evolved weapons like the Bloodmoon Scythe or Thousand Edge evolution. Passive items that boost projectile speed help destroy the homing orbs before they reach you.
The Lycan Alpha is arguably the most aggressive boss in the mid-game roster. It dashes unpredictably in zigzag patterns and summons packs of lesser lycans that attempt to flank you from multiple angles. The Lycan Alpha's speed makes it difficult to kite in tight corridors, so open areas of the map are strongly preferred for this fight. Builds centered around screen-wide damage — particularly evolved versions of the Lightning Ring or Santa Water — can handle the minion packs while you focus on dodging the Alpha's lunging attacks.
Both of these bosses can appear simultaneously during Bloodmoon-empowered runs. When that happens, prioritize eliminating the Crimson Matriarch first, as her blood rain severely limits your movement options and makes dodging the Lycan Alpha's charges nearly impossible.
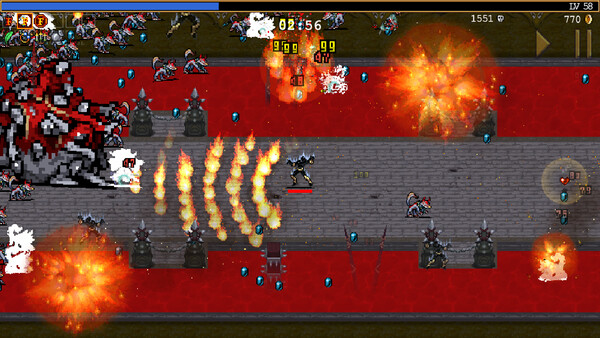
Endgame Encounters — The Bloodmoon Elders
The Bloodmoon Elders represent the ultimate boss challenge in Legacy of the Bloodmoon. These ancient vampiric entities appear only during the final minutes of a run and arrive in a coordinated trio, each Elder governing a distinct combat domain: one commands swarms of bat-like projectiles, another creates expanding zones of cursed ground, and the third functions as a melee juggernaut that relentlessly pursues you at high speed.
Defeating the Elders requires a well-rounded build with strong screen-clear capability, high sustained single-target damage, and enough survivability to weather overlapping attack patterns. Evolved weapon combinations that provide both burst and area coverage are essential — pairing something like the Vesper's Tear with the Sanguine Cross evolution covers both needs. Defensive passives such as enhanced armor and health regeneration become critical here, as chip damage from the cursed ground zones accumulates quickly.
The Elders cycle through a coordinated phase pattern where two will attack aggressively while the third retreats to regenerate. Focus fire on whichever Elder is not in its recovery phase, and be prepared for their final enrage when the last Elder standing absorbs the power of its fallen allies, dramatically increasing its attack speed and spawning a relentless wave of minions. Survival during this final phase often comes down to having Revive charges or a fully upgraded defensive aura ready to deploy.
Recommended Boss-Killing Builds
For players seeking a reliable all-purpose boss build, start with a character that has innate bonus damage or projectile count and prioritize evolving weapons that combine area damage with single-target burst. The Sanguine Cross evolution paired with the Bloodmoon Scythe provides excellent coverage against both boss health pools and their minion escorts. Supplement with passive items that increase area size, projectile speed, and cooldown reduction to maximize your damage windows between dodges.
Defensive itemization matters more in Legacy of the Bloodmoon than in the base game. Boss attacks hit significantly harder, and many encounters feature unavoidable chip damage from environmental hazards. Prioritize at least two defensive passives — enhanced armor and health regeneration are the most consistent choices — and consider bringing a character whose innate ability provides a damage shield or temporary invulnerability. Having at least one Revive available for Bloodmoon Elder fights is strongly recommended, as their enrage phase can catch even experienced players off guard.
Finally, map knowledge plays an underrated role in boss encounters. Many bosses have attacks that interact with terrain — the Bone Colossus's shards reflect off walls, and the Crimson Matriarch's blood rain pools persist longer in enclosed spaces. Whenever possible, maneuver bosses toward open areas of the map where you have maximum room to dodge, and avoid backing yourself into corners where overlapping attack patterns can trap you.